Saturday, November 9, 2013

It's Been Awhile- Time to make E-Bomb Roll

It's been a long while.
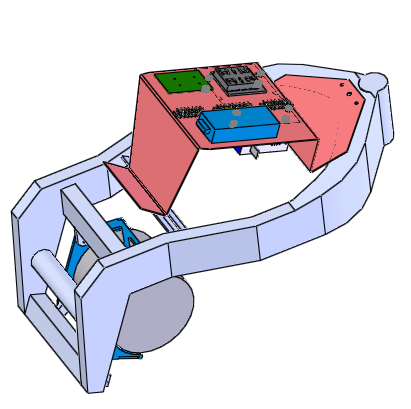
Can you identify what is missing in this picture?
If you guessed batteries and a charger, then you are correct? Do I sound a little sore? Oh yeah!This hiatus wasn't intended. It really started when I had everything ready on the E-Bomb for batteries.
Since I didn't want to wait for them to ship from China, I shopped around and compared battery options and found a local supplier that had US stock(?) to hopefully save on schedule and shipping costs....
After placing my order on their website, I didn't get  a response for a couple of days. That should have been a cue to cancel.
About a week after I had placed the order and paid, they contacted me for another $200 shipping. That was after I had already paid shipping at purchase. I was assured this shipping was to expedite the charger (which apparently was being programmed in China. I thought it was US stock). The $200 was so that it would get DHL shipped and I would have it in a couple days. Hah! I got it about 4-6 weeks later...


     Now to the batteries. Turns out the company I ordered from was in dispute with the battery distributor (on the East coast no less) and so my batteries got shipped after about a 6-8 week delay. Shipping took a long time. I suspect they shipped from China anyway judging from the wooden crates the smell of China.
    In the frustration of the delay, I moved to another project and now am wrapping that one up and am rolling up my sleeves to make this baby run. Too bad we are experiencing freezing temperatures every morning. I might not get too much use out of it for a few more months.
The charger is very big and a lot heavier than I expected. Hopefully that equates to rugged Chinese durability... Hey, they built that big heavy wall and it is still around after a few millennia. So this thing should be good for a few decades as least :-) I will have to get creative on an installation location or just opt to leave it at home or work.                                                                     The next step is to make a 3d model of the batteries and figure how to package them on the bike so as to be the least obtrusive. I have looked at a few options and no matter how you cut it, 120 lb of batteries is hard to package. Things should be moving next week on this. Forgive me for this delay as I forgive this deadbeat supplier.
 

Sunday, August 11, 2013

E-Bomb Gets Brighter

I know I have mentioned the headlight several times. I have had a pair of headlights from a 1938 Chevy that I have been saving for something cool. I was originally thinking I would put them on my street rod, but it turned out one was pretty rusty and so what do you do with only one old headlight? You put it on a motorcycle of course.

The headlight had apparently been mounted to a lot of things in a number of different orientations as evidenced by the number of broken out holes on the bottom of it. I actually harvested it from a Model A Ford 1 ton truck. It is pretty cool and has a brass g-682 tag.
Here's what it looked like at first:

I added a piece of 18 gauge steel to fix the holes and reinforce it for a mount.

 I then ground it off.
 After fabricating the mount and painting, it looks like this:


 I am pretty happy with it so far. It is fixed to the frame so it looks a bit odd when turning as it stays pointed straight ahead. I kinda like that. It is also just strange enough looking on this bike that it begs a second look.


The LED lights look pretty bright. We will see how they do on the road soon. My sense is that they will be OK for daytime running lights, but would need some focusing optics to be useful at night.

Side View

View with Tank Installed

Saturday, August 10, 2013

Mounting the Motor

I got the motor mount parts roughed out on a CNC plasma machine and then we put them on our mill to add the hole pattern and detail for the motor mounting. Once that was done, took everything to Fab-Tech where Josh TIG welded the motor mount together. It looks pretty good I think. This shot is looking from the bottom of the bike up while we are welding and fixturing.

Thursday, August 8, 2013

A Sprocket Finally

It turns out that the fifth sprocket I ordered actually fit. I ordered a couple from a few different dealerships only to find out a 5-10 days later that it was out of stock and no longer available. It must take a long time to walk back to the shelf and look... Must be a BIG warehouse. I am working on the motor mount today and the front sprocket should be in today as well. I have the controller and contactor installed and most of the low voltage wiring. Also the DC-DC converter came in which will get me 12VDC out with input of 70-150VDC input. I installed that last night. I am missing headlight and front signal lights and associated wiring and batteries and charger. That is about all. I suppose I could pull batteries out of every car and motorcycle I own and string them all in series and make the motor spin. It would be a lot of work, but is sorta tempting. 


Monday, August 5, 2013

E-Bomb Gets a Brain

In addition to a lot of wiring, I added a micro controller for the E-Bomb to allow for computer controlled effects (lighting). I used the "Omni-Board" from invenscience:
http://www.invenscience.com/index_files/omniboard_controller.htm

It worked pretty well. Initially, I just hooked up signal lights and brake lights and signal and brake switches. That allowed me to pulse the brake lights when applied and sequence the signals a bit. Here is a pic of the wiring panel.
 
 It is getting busier. I also received and installed the contactor as well. I wired it to the motor kill switch that remained from the gas engine. That way if something goes wrong, it is right next to my thumb.

This week should see the motor getting mounted, some progress on the LED headlight assembly, and batteries getting ordered.

From the bottom, you can see the contactor and motor controller mounted in place underneath the bracket.

Monday, July 29, 2013

Electronics Mounting Bracket

I really wanted to come up with some type of electronics mounting bracket that would tuck all of the motor controller and other electronics up inside of the hollow gas tank. The tank would provide protection and still make the bike look half way normal. I created a pretty good 3d model of the bike frame and then made a solid model of the sheet metal mounting bracket.

Electronics Mounting Bracket

The electronics bracket is shown in red in the pic above. I was thinking I would send it out to be fabricated, but got a little impatient and spent a few hours Saturday and just fabbed it up.

Here's the actual Fabbed Bracket


I know it looks pretty boxy, but the tank still goes over it and covers everything.

Saturday, July 20, 2013

Design Techniques- Kelly Johnson Skunkworks vs. 2013 Solidworks

I have debated on how to design and layout all of the components in the frame for quite some time. Is it more efficient to go to the  trouble to create a Solidworks 3D model of the motorcycle chassis or just do the old school trial and error. I finally decided that I can get through many more iterations faster and end in a more refined and optimized design if I go to the initial trouble and time investment to create the 3D model so I got up nice and early today and made a model. Take a look below.


I think this will be accurate enough to get the motor mounted and pack the batteries in. I will do some refinement to it to get the detail needed to create the electronics and controller mounts up under the tank. See below for a first cut at packaging the ME1003 into the frame. It really wants to be there. It looks like it really belongs there.


Thursday, July 18, 2013

Throttle Details on Electric Motorbike

I ordered up a Magura throttle. It looks ok. It doesn't feel super precise, but it will probably work fine. I looked abroad the Web and didn't really see anything that looked awesome. The egress of the wire was a problem as i plan to use the stock kill switch assembly and the wire from the throttle ran right into it so i was able to cut a hole into the kill switch housing and run the throttle wire right through it where the old throttle cable once ran. It worked pretty slick and only required about 30 minutes with a dremel.

Supporting a Bobber Seat

The seat structure was cantilevered and was not properly supported. I added struts to triangulate the structure.

The Motor Just Came In!

UPS just brought the motor in. Here are a couple of quick pics...
It is the Motenergy ME1003. We bought it from Cloud Electric.


Fixing a Hacked Bobber

The back part of the frame had been hacked off by a previous owner leaving it looking very un-finished and sharp edged. It also did not have a proper mounting for the back of the seat (sort of important). See what we did below. Thanks to Josh from Fabtech for the late night work!
One more thing... The previous owner didn't run with all the motor mounts connected so one of the mounts broke off. Josh TIG'd that on last night too.
Fixed motor mount

Here is the before picture.

Another before picture, no way to mount seat.
 
Motor mount fixed.


 Here is what it looked like after adding a few parts
Here is the new seat support

The back surface will provide the mounting for the signal/tail/brake light


Monday, July 15, 2013

Just linked to www.invenscience.com

Since Invenscience is paying for the E-Bomb fun, we need to link to the Invenscience website and it is linking here. www.invenscience.com

Saturday, July 13, 2013

Low Voltage Wiring

I retained the handle bar electrical controls for the most part. Bright, dim, signal, horn, engine stop will all be retained. I had to ring it everything and then change out the connectors to something that is readily available. I went with the Delphi weather pak stuff since i had some  around. Done of the signals were not needed and were isolated and tied back. I also retained the key switch and lobotomized it as well and changed to friendly connectors. See pics.

Friday, July 12, 2013

Big Day! Ordered the Motor and Controller

Today we ordered the motor and controller.
For the motor, I did a lot of trade study work and comparison. I really wanted a BLDC motor, but in the end, it added about $1000 in cost and I can buy a new set of brushes for $100 so I ended up going brushed, permanent magnet. Once the motor was selected, it made the list for the controller search pretty short. Here are the motor trades. I went with the Motenergy ME1003. For the controller, it was an Alltrax Axe 7245.

I bought the motor from Cloud and the controller from EV-Drives. There is a lot of variation in pricing on controllers for the same part number from different vendors. If you are doing this search, shop around. Check ebay too as I was able to save $193 on the controller buying it from EVdrives on ebay versus buying it off their website.

Thursday, July 11, 2013

Its a roller!

With the rear rotor turned (thanks to Paragon Tool) and a new set of pads in the back and a new bearing, it will actually roll around and the brakes work on both ends. Wow! We are actually ready to start the electric conversion.

Dampener Issue Solved

After machining 3 iterations this morning, we got it right. Very little sloop and i think the polyethylene scraps we had laying around will work just fine.

Custom Torsional Dampener

After pondering the dampener overnight, I realized we ("Invenscience" since Invenscience is funding this project) have a sheet of black .750 thick PE. If I model something up quick in Solidworks and then we mill out a few wedges, we can probably replace the dampener in a way that will reliably survive.

Layout where the blue represents the wheel, red represents the hub and black is the dampener wedge

Dampener Wedge- 8 required

Wednesday, July 10, 2013

Gas Tank Bottom Looking OK

After cleaning up the cut with a 3"cut-off and adding some lip seal and flat black paint, it looks almost like the boys in the green factory in Japan meant to omit the bottom of the tank.

A Bit of a Snag

The torque dampener in the rear wheel is totally trashed. It turns out it is discontinued from Kawasaki and nobody had one. Not even Ebay. Bummer! Granted the power from the electric motor will be a lot smoother than banging through gears, but i need something to fill the gap. It doesn't look too bad until you realize that all of the material that is in compression during acceleration is totally gone.
What is to be done? Could make a mold and cast one out of urethane, but that would be a big investment. I think maybe the simplest solution us to machine one out of UHMWP. I could build it in segments.

Tuesday, July 9, 2013

High Level Trade Studies

I am doing some trade studies on various different approaches and thought some of it would be worth passing on to someone that might be tackling a similar project.

Keeping the Tank?

Why keep the tank on an electric motorcycle? On a bullet bike at least I have three arguments for keeping the tank:
  1. Cosmetic- The big muscular looking tank adds to the tough look of a bullet bike. Take it off and in my opinion, it looks kind of dorky.
  2. Storage- It makes a great weather protection and storage area for electronics if you cut the bottom out of it as I did.
  3. In my case, it formed part of the mounting for the seat.

Exoskeleton

In my opinion, a bike with an exoskeleton is much better to work with for electric since you can stack lots of batteries in the center of the chassis as it gets rid of the obnoxious center tube that runs from forks to seat. The late 80's and 90's bullet bikes are great because they have the exoskeleton and many are aluminum. Mine is really pretty light once liberated from the 4 banger motor. I can easily lift the rolling chassis (before adding motor and batteries). I am hoping to keep the total weight to about 400 lbs. If it is approximately 150 now and I add 200 in batteries and 40 for motor, 10-20 for controller and misc. It should still be pretty close to 400 which is lighter that the stock 467 lbs.

Saturday, June 29, 2013

Chains and Belts for Final Drive on Electric Motorcycle

I thought it might be helpful to someone to post the info I found on chains and belts. It turns out that the Ninja came stock with a 530 chain. That means it is 5/8" pitch with a 3/8" wide roller which it turns out is the same a 50 series industrial chain as far as I can tell so I am planning to run a stock (new) 46Tooth rear sprocket and then buy an industrial chain and front sprocket that is 7/8" bore with 3/16 key. This will drop onto the Motenergy motors I am looking at. It also gives me tons of options for gearing changes to tweak acceleration / speed.


I did look at a possible toothed belt drive, but the cost of pulleys is ridiculous and every time you do a gear change, it is likely that you will have to change belts as well. Another big neg is the massive size of the rear wheel pulley. Oh yeah, one more neg, unless you have a removable section in your rear suspension, you can't get a belt onto the frame. The E-Bomb does have a removable section so it is a possibility, but not worth the cost.

Thursday, June 27, 2013

Tank hacking continues

When you are racing, baffles are a good thing. When you taking apart a tank, they are not your friend. I keep feeling the urge to get the plasma cutter, but the 4th if July is still a week away so i resist.
I was thinking some purist restoration guy might be annoyed that i am hacking this tank. After seeing the inside, i did that guy a favor.
This means more of the original 500 lbs is gone.
Now i think i will dare to get a 3"cutoff in there to clean things up. The objective if this project is not to create a show queen, but to create a rolling functional test bed, a veritable two wheeled laboratory of learning.
Starting the Hack 
 
The bottom of the tank removed 
 
The Rust!